Installing a pond liner
For those preferring a more unique design albeit with a little more work, flexible pond liners are available to suit a variety of styles and budgets.
1. Marking out
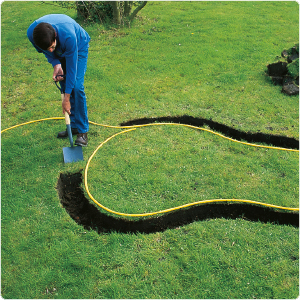
Once you have marked out the desired shape with rope, sand or hosepipe, dig around the design, making a 15cm deep collar, one spade width wide.
Dry concrete mix can then be placed in the trench. Spray with water, and allow the concrete collar to set overnight.
2. Adding shelving
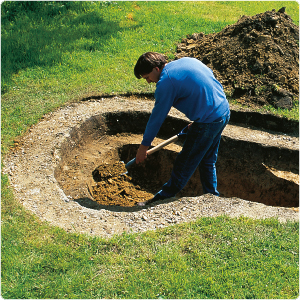
Once the concrete has set, start digging the marginal shelving. It is advisable to buy plant baskets first to ensure they fit the shelving. Allow 5cm extra depth above the basket depth to allow for a top level of gravel around the plants’ base.
3. Working out liner and underlay
Once dug, the hole can be measured up for the liner. Use the equation below to calculate underlay and liner size. Underlay is essential to protect the liner.
Width + (maximum depth x 2) = liner width
Length + (maximum depth x 2) = liner length
Add 30cm to the overall length and width, in order to allow for overlap.
Eg: 3m x 2m pond, with a max depth of 0.5m. Depth x 2 =1m.
Liner required is:
Length 3+1+0.3 = 4.3m, Width 2+1+0.3 = 3.3m
4. Laying out liner
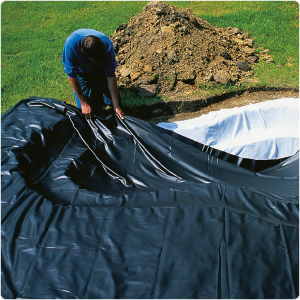
Having checked for, and removed, any stones or sharp objects, lay the underlay in the pond and place the folded liner on top.
Carefully open the liner up and lay it on top of the underlay. Ensure there is ample liner around theedge of the pond on which coping stones, decking etc can be positioned. When laying the liner it is advisable to remove shoes to prevent damaging the liner.
5. Finishing touches
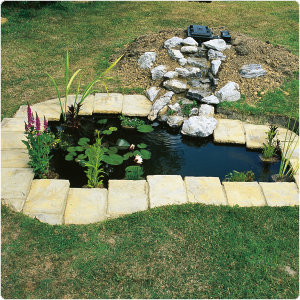
Once the liner has been installed, any paving or rockwork can be added to the surrounding area. If a rockery and waterfall is desired, remember to save the soil from the excavation.